This is one of those posts/projects that I just love. I am so proud of how it turned out. It started with a little bit of pinspiration. Okay, so it sounds like perspiration. Pinterest + inspiration = pinspiration. The image that inspired me was this
| (source) |
I saw this on Pinterest and repinned it. I never even traced it back to the owner until I sourced it just now. I didn’t really look into it much. I just saw it and instantly formulated an idea of how I wanted to make this. Since I was making it up as I went things kind of changed as I went along. I started by gathering supplies.

Gathering supplies was where the vision first began to change. I originally imagined all the butterflies as one color. When I saw this paper pack (and it was cheap) I decided to change it up. Sometimes paper can be so expensive!

This paper punch is super cool. Magnets attach the two pieces so you can put the punch anywhere on the paper (instead of just around the border). These aren’t cheap, but I used my 50% off one item to make it more affordable. I see a butterfly themed birthday party in Eleanor’s future so I know it will go to good use.

These are the sticky dots I used to adhere the butterflies to the string and to each other. The thing I was most worried about finding/making was the ring. As I was walking through Michael’s I spied these for under three bucks (and there were three of them!!).

Not sure what they are used for, but for whatever reason they were in the leather section. The rest of the supplies are pretty self-explanatory. Clear string (beading section) or fishing line would work and ribbon (which I ended up not using). Like I said the project kind of morphed as I went along.
I decided I didn’t really want my colors in a “pattern”. I also knew that I didn’t want the strings to be all the same length or all the butterflies to be the same distance apart so there really was no rhyme or reason to this next part (other then I didn’t want rhyme or reason).
Part one, punching the butterflies. Not as time consuming as I thought. I was banished to the the porch by my husband because the puncher was so loud and he thought I would wake the sleeping kids.

I believe it ended up being around 300 butterflies that were punched. I promise, it goes faster then you think. Part two is attaching the butterflies to the string. I would push a butterfly onto the sticky dot.

Peel off the butterfly (sticky dot attached) and set the string on the sticky dot.
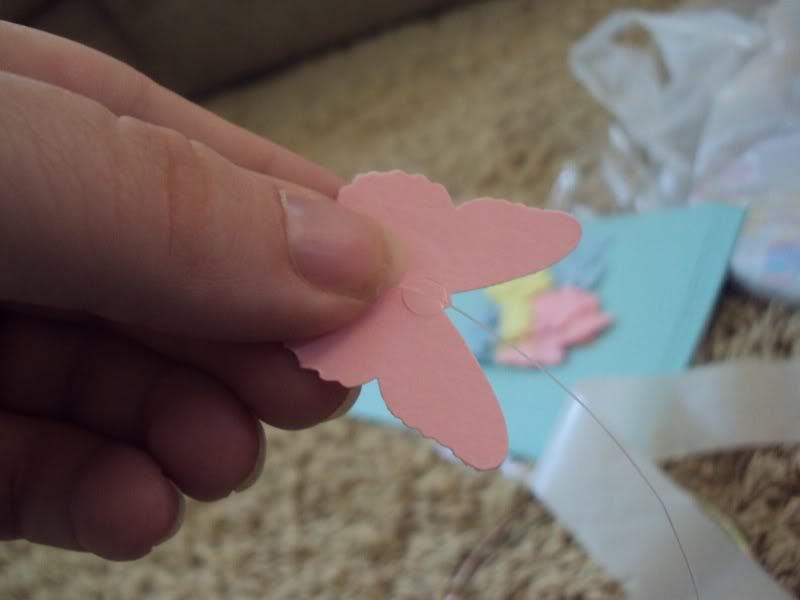
I then pressed another butterfly on to the butterfly to make a butterfly and string sandwich. Don’t you love my technical jargon?

I would continue in this manner until I decided that a string was long enough and then I would cut it (leaving a little extra for knot tying). Eventually my living room floor looked like this (if you have an aversion to butterflies…look away!).

While I was busy doing this the husband was busy cleaning the house. He even cleaned the microwave! He also managed to sneak outside and spray paint the hoop for me. Cleaning and crafting! Sorry ladies, he’s taken.
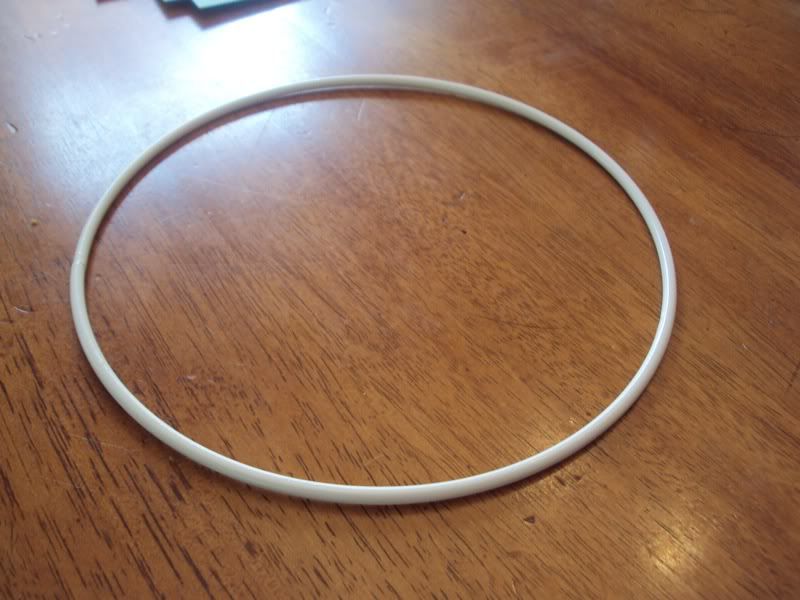
Much better! That whole bronzy look was cramping my style. By the way, I add a “y” on to just about anything and call it a word. So now my butterflies are ready to fly and my ring is gorgeous white, but I haven’t yet figured out I am going to hang this contraption. I bought the ribbon for this reason and started with the ribbon, but all the focus seemed to be on the hanging contraption and not on the butterflies. The husband agreed and suggested I just use the fish line (or whatever the technical term is). We decided it would give it a more “butterflies in flight” kind of feel. This is where I get really high class. I needed something to attach the four pieces of string to so that this mobile could hang from the hook. This ladies and gentleman is where I decided to use a key ring. I then preceded to hang the mobile from our key organizer so I could attach the butterflies.

Some where along the line we decided we would fold back the butterfly wings (remember there are two sandwiched together) to give it a more 3D in flight effect. My husband and I made a little assembly line. He unfolded wings and I tied them on (in no particular order) using the good old double knot system.

When we were all done tying we were left with this magical and lovely thing that made our hearts flutter (pun intended).

At this point we were really excited. We clipped all the extra string put a hook in the wall and hung her up. We also dabbed a bit of glue on all the knots (you know, just in case) for security. Then we sat back and admired her beauty.
After sitting with her for a while we decided her metal ring (although painted white) just wasn’t the look we were going for. I took left over ribbon (from my craft stash) and cut it into small strips and tied it on in knots around the ring.

Enjoy!
The space before Madame butterflies arrival.

And after her arrival.


I think I just took more pictures of this butterfly mobile then I have of my children. Whoops! Seriously, can you tell I love it. Pinterest is both inspiring and dangerous. I keep coming up with more project to do. Any of you tackle a mobile? Any of you take on a Pinterest pin or been pinspired (haha)?
CLICK HERE TO SEE WHERE I PARTY AT!
Want FREE printables and more. Join my newsletter!
Subscribe to get our latest content by email.