Yay! It’s spring! Okay, not really. We have a fresh 7-9 inches of snow outside and the ten day forecast doesn’t even hit 40 degrees. In my head: December, January & February are winter, but that is it. After that, I am all about spring. Four seasons, 12 months means each season only gets three months (cue laughter from every.single.person who lives in Wisconsin). Needless to say, regardless of the weather, Easter is right around the corner so it was time to get my Easter/spring shelf on.
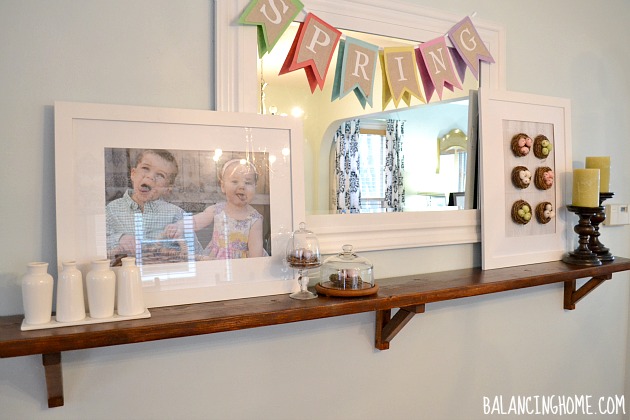
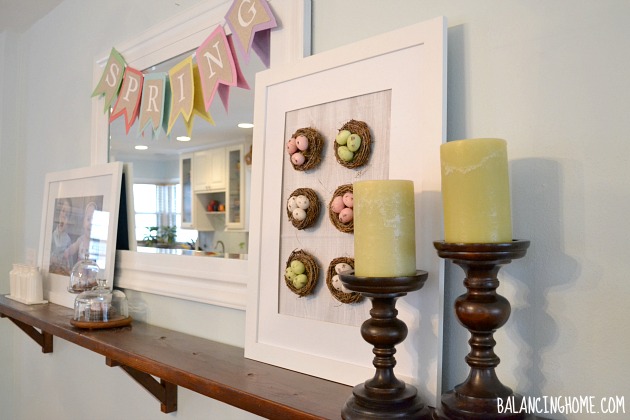
I took Valentine’s decor down and have been living with an empty shelf for about a week. Today, during Eleanor’s marathon nap (5.5 hours) I finally got around to putting something up. Y’all know how I love to change this shelf up. You can find the many looks of my ever-changing dining room shelf here. I used strictly what I had on hand and this is what I came up with.
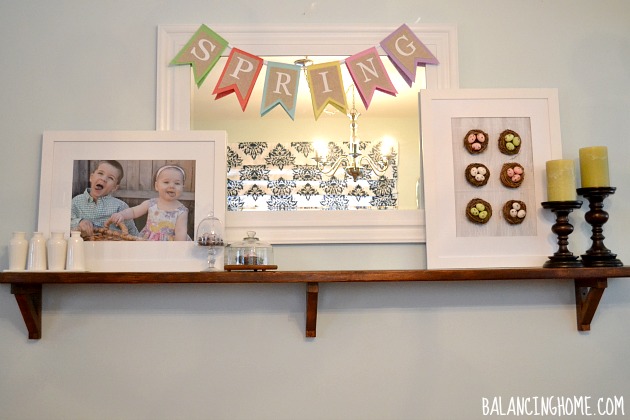
That pic is from Easter last year. The basket was a prop to help Eleanor stand up, because she couldn’t do that on her last Easter. Now she is running around like a crazy goon. How much has changed! The white vases are a Goodwill find from my decor stash. One cloche is a rummage sale find and the other a birthday gift. The spring bunting I picked up from Target last year for pretty darn cheap. The candles have been part of the house decor for years now.
The part I am really excited to talk about is the the nest specimen art. Last year at Target I picked up two boxes of these nests for super cheap (umm…$2.98).
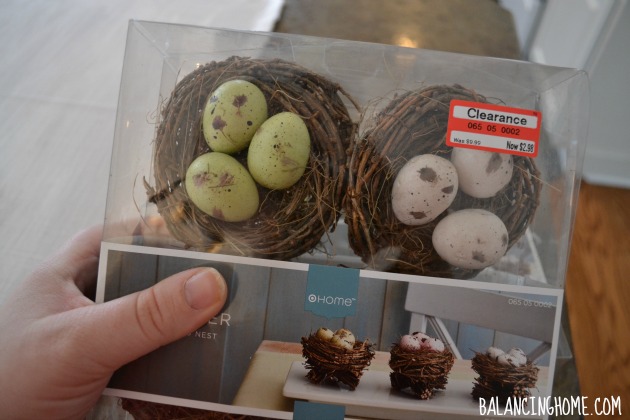
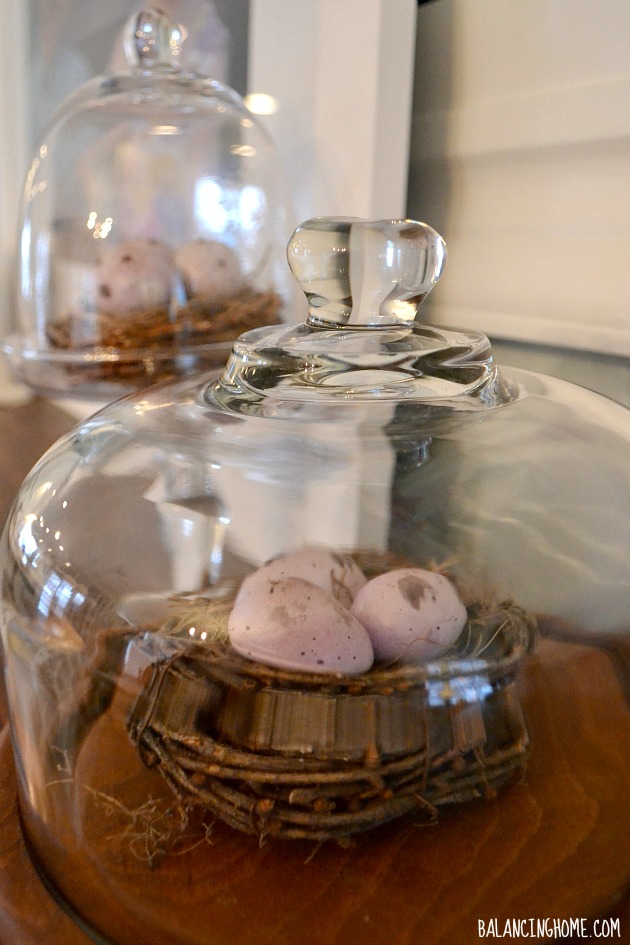
When I bought them I had no idea what I was going to do. Heck, I didn’t even know today until I pulled out all the “potential” decor and started thinking. Two of the nests were used to fill the cloches.
The other six were used in my specimen art. To create the specimen art I popped the glass out of the frame and put it away for safe keeping (no permanent changes here). I cut a piece of cardboard to size and painted the cardboard with Mod Podge. I used extra fabric from my no sew faux roman shade project and laid it on the cardboard. Once that dried I snipped the excess fabric and popped it in the frame. Then I busted out the hot glue gun and applied the glue to the back of the nest and then plopped the nest down and gave it a little pat. Repeat. Nest specimen art complete.
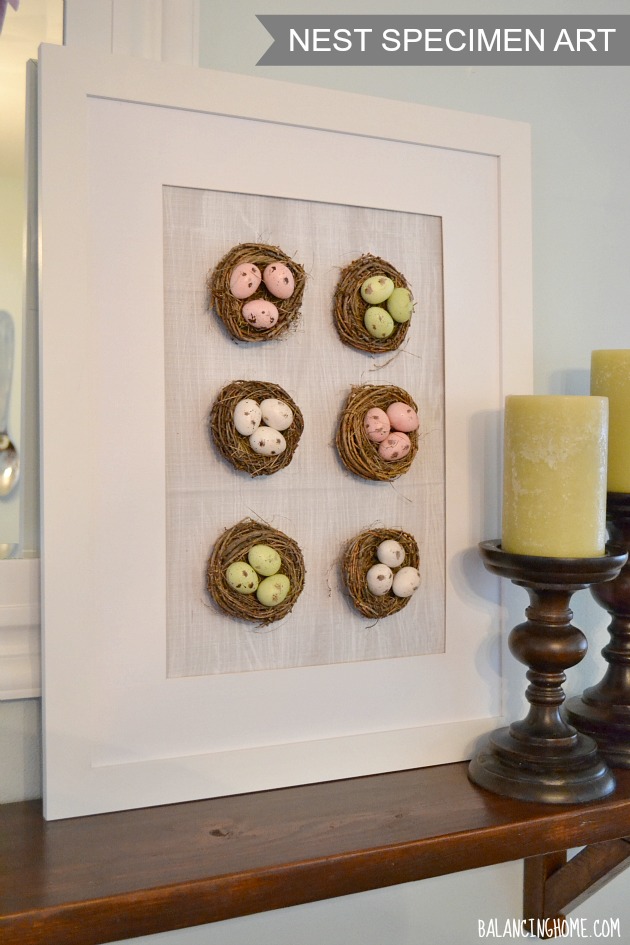
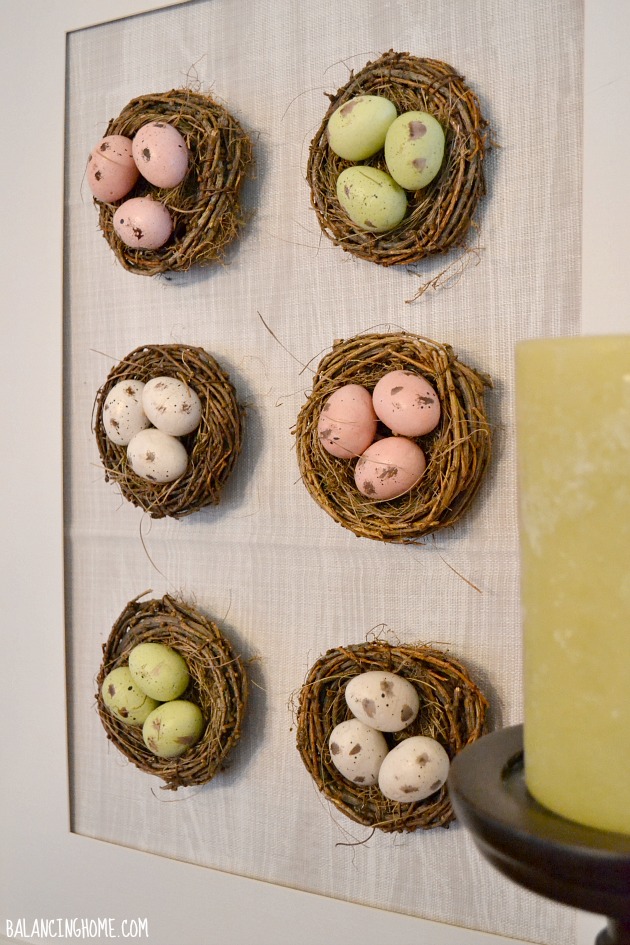
I am super happy with how it turned out. Fun spring colors, clean and simple and cost me next to nothing.
Are you starting to get the itch for spring? I am dying to walk with the kids to the park and hit up the zoo. As much as I am looking forward to spring, I know that this spring brings some BIG changes for the Bray household. I am excited about meeting this little bundle of joy, but at the same time it means things are changing. I don’t want to “wish my days away” as my mom would say. So I am going to enjoy all the extra snuggles and attention I can bestow on my two cutie pies for now.

If you are looking for more inspiration stop by my project gallery or take a tour of my house. Thanks for visiting!
Sharing this project at: Tatertots & Jello: Weekend Wrap-Up Party, Thrifty Decor Chick: Before & After Party, Home Stories A to Z: Tutorials & Tips Link Party
Want FREE printables and more. Join my newsletter!
Subscribe to get our latest content by email.