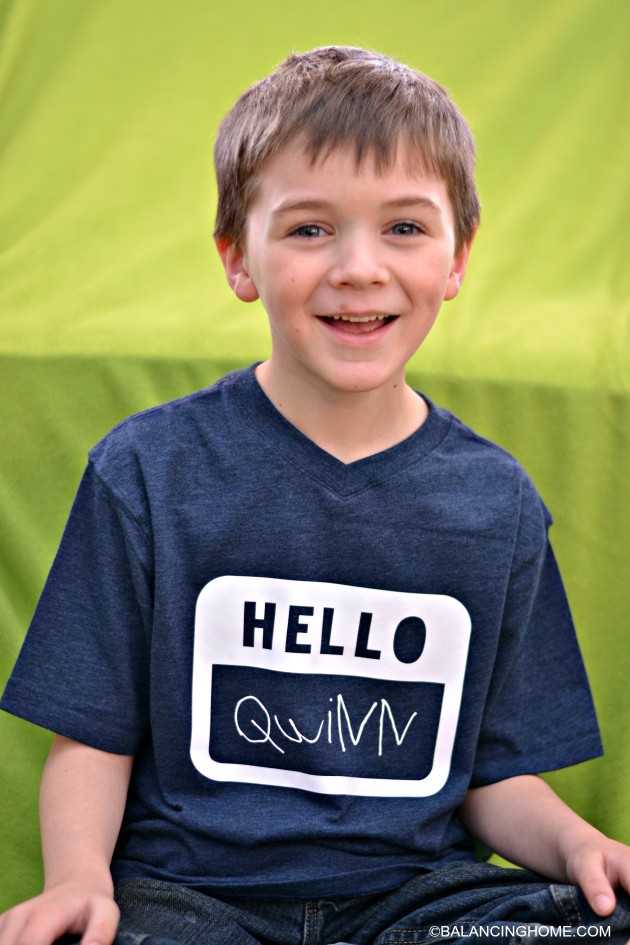
I first shared Quinn’s tshirt with his handwriting on the blog a bit back.
Today, as part of the #DesignSpaceStar competition, I’m going to share how you can get your child’s handwriting on your own creation. My team is working on fall projects and this shirt seems like the perfect Cricut project to kick off back-to-school.
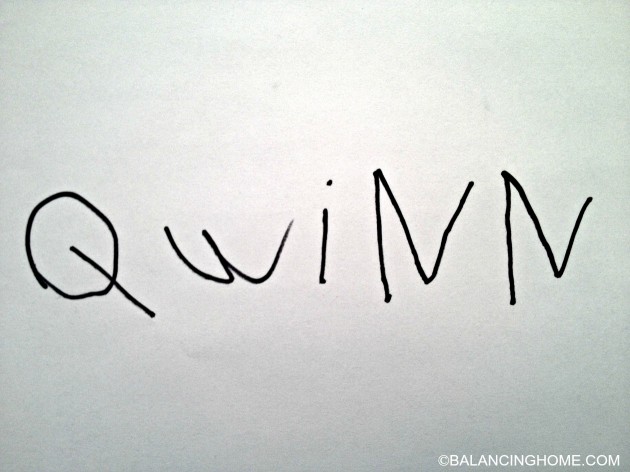
To create with your child’s work make sure that their work is clear. Have them write or draw with a permanent black marker on a clean sheet of white paper. For our project, we held our phone over his paper and snapped a picture with our phones. We have a scanner, but this was quicker and easier for us. I then opened the picture in PicMonkey and saved it as a .png.
You can upload this image into Cricut Design Space™.
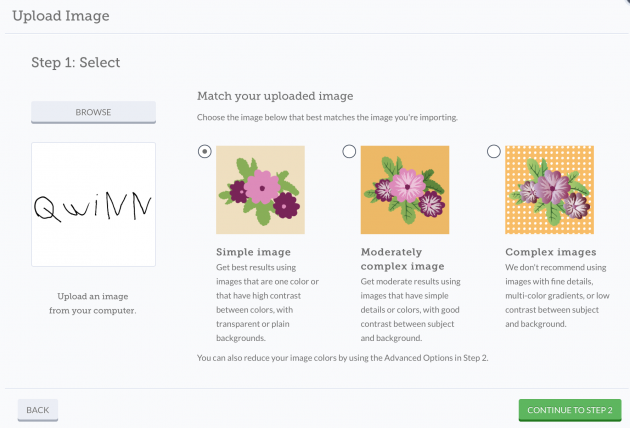
Your screen will look like this. Choose simple image and click to continue on to step 2.
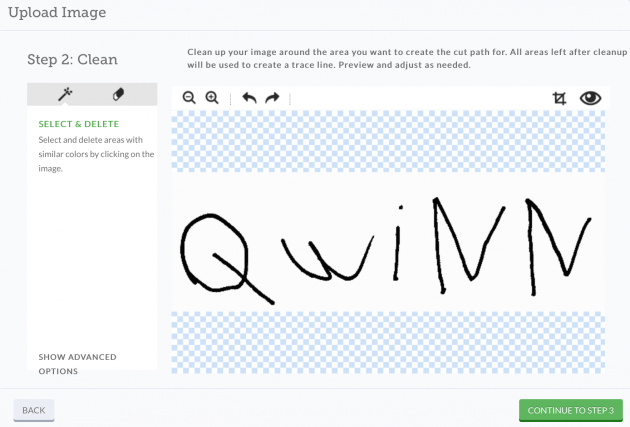
In step 3 you will need to clean up on the background. You need to click on the white background to erase it–you want to see checker everywhere else.
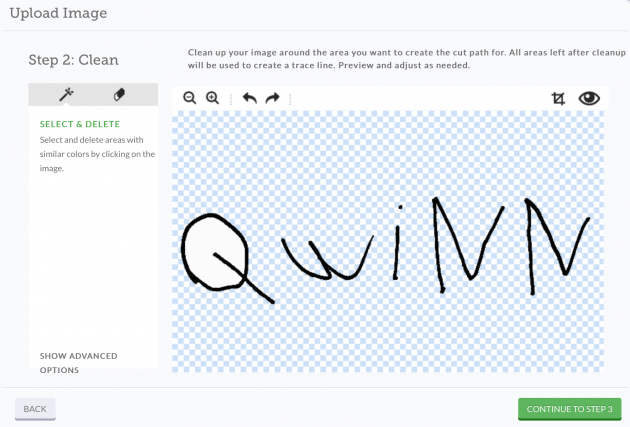
You can see that with one click, all of the background disappears except for the inside of the Q.
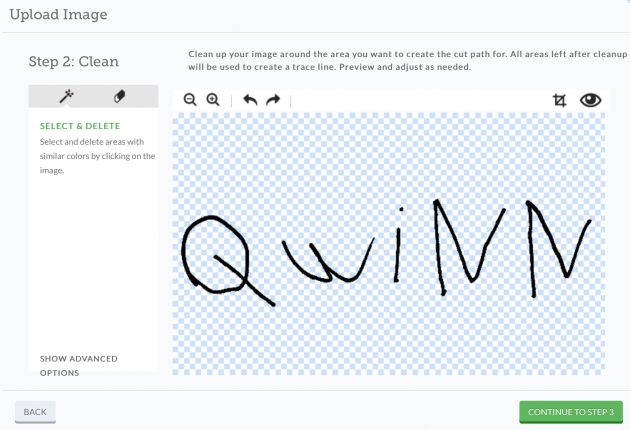
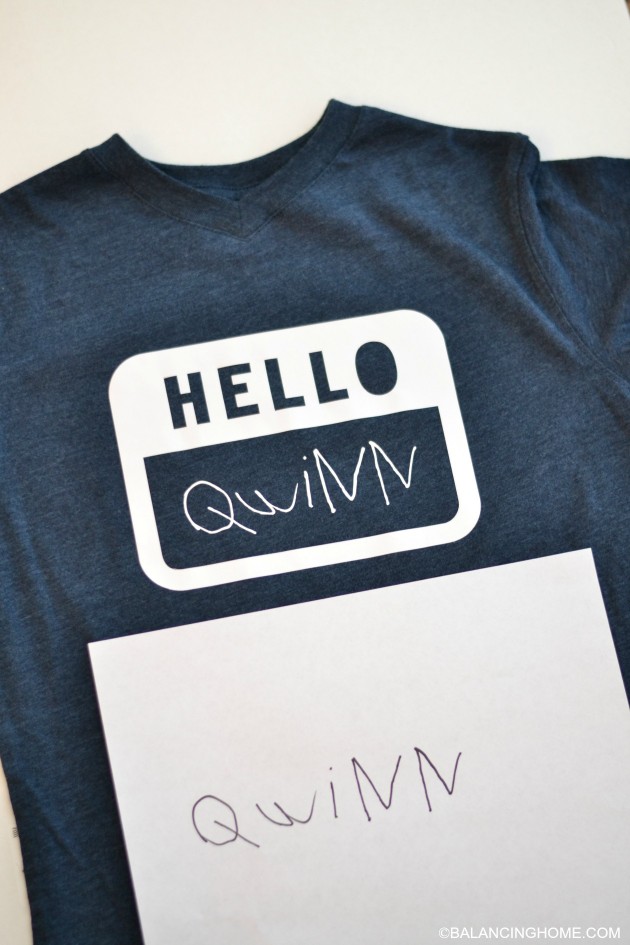
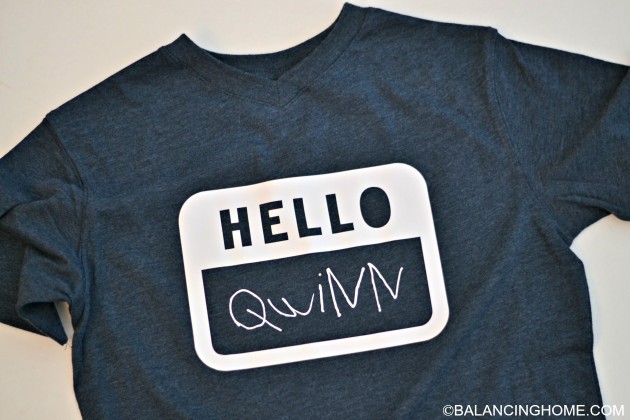
One click inside the Q and your child’s handwriting is ready to be added to your shirt! I coupled Quinn’s handwriting with an already made design in Cricut Design Space™. To make sure the program read the design as one, I selected all the elements and welded them together. I used the white iron-on that came as a sample with my machine. Be sure to check the box to flip your image so that when you iron it on, it reads correctly.
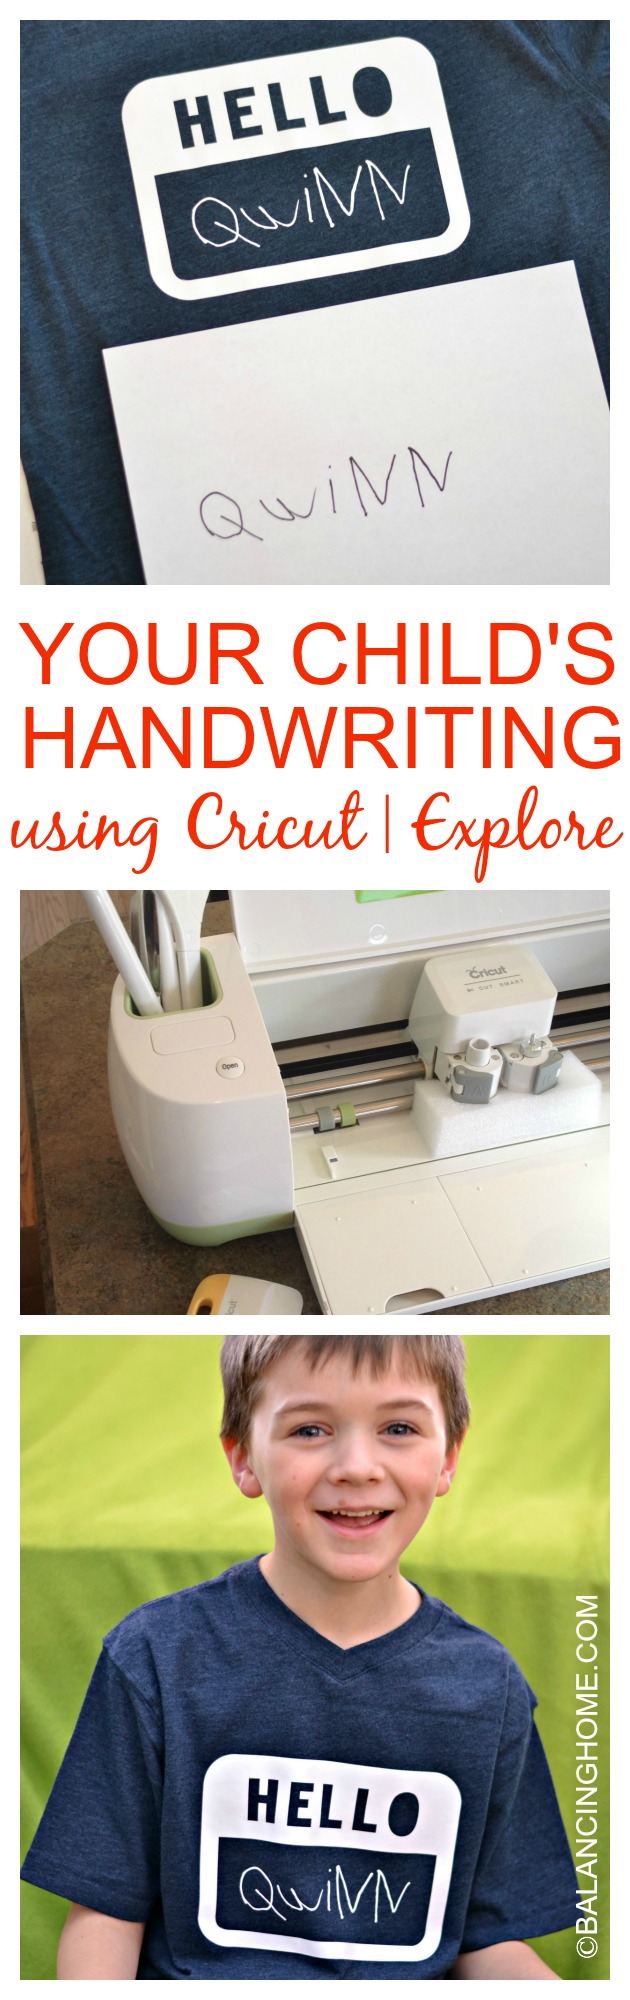
We have washed this shirt a bunch of times and the iron-on has held up really well. You can find more of the fun I have been having with my Cricut Explore here.

Want FREE printables and more. Join my newsletter!
Subscribe to get our latest content by email.