My twin brother (also known as my womb-mate) and his wife are expecting their first child. They are due three weeks after me. They only live one street over and two blocks down too, so this should be a lot of fun. They have been working pretty hard to create an, Oh, The Places You Will Go Baby themed nursery. I have seen bits and pieces of it, but still need to house crash. Maybe they will even let me share their hard work with you. It only seemed fitting that their shower be of the same theme.
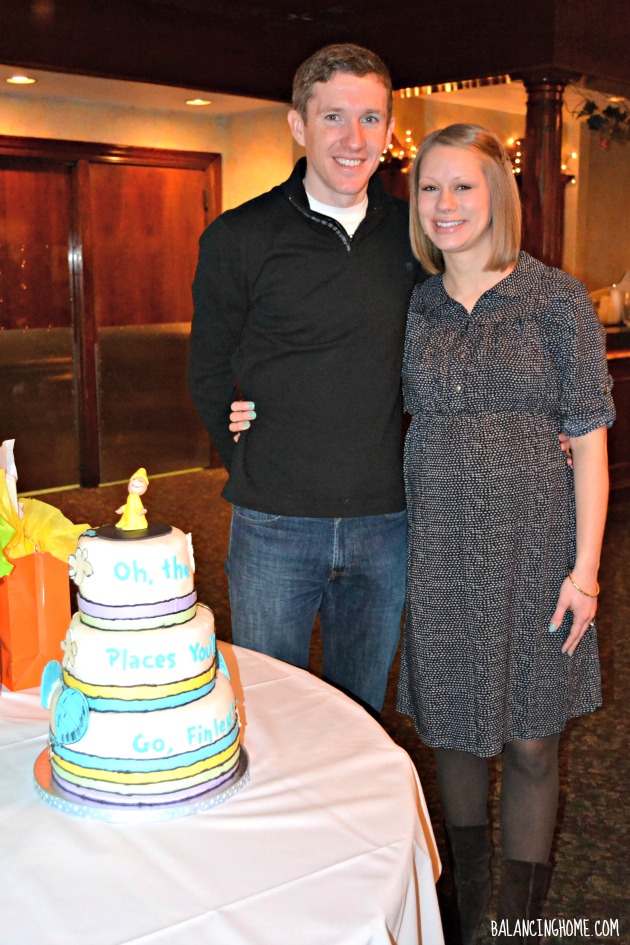
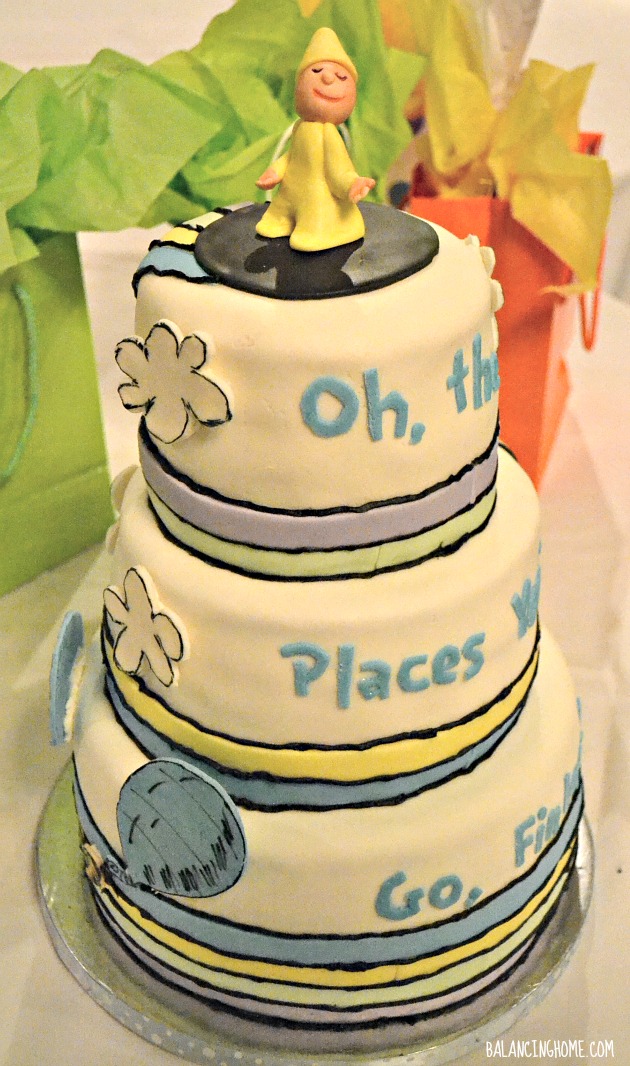
There are the guests of honor! The cake was done by my mom’s co-worker. It turned out fantastic.
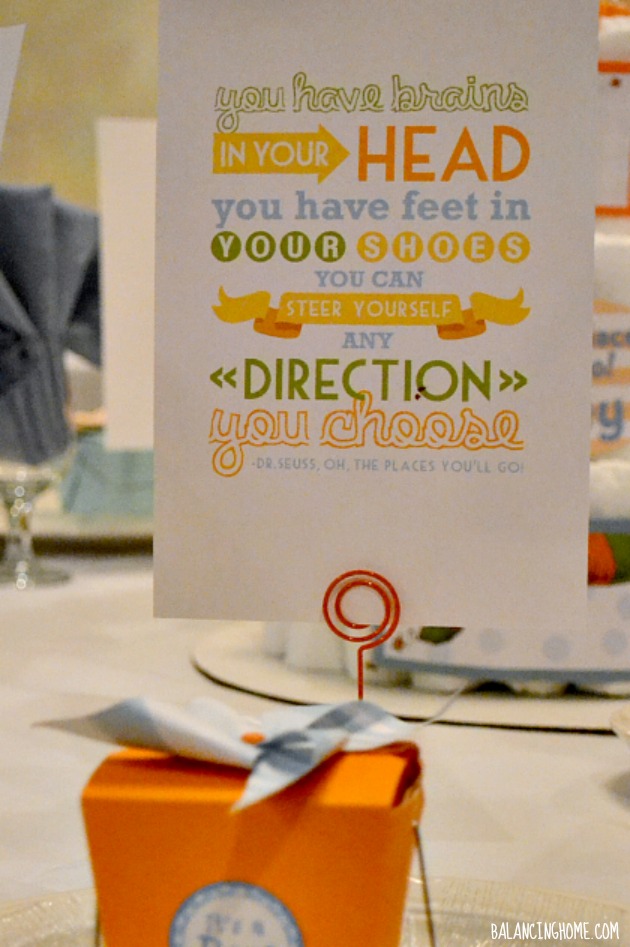
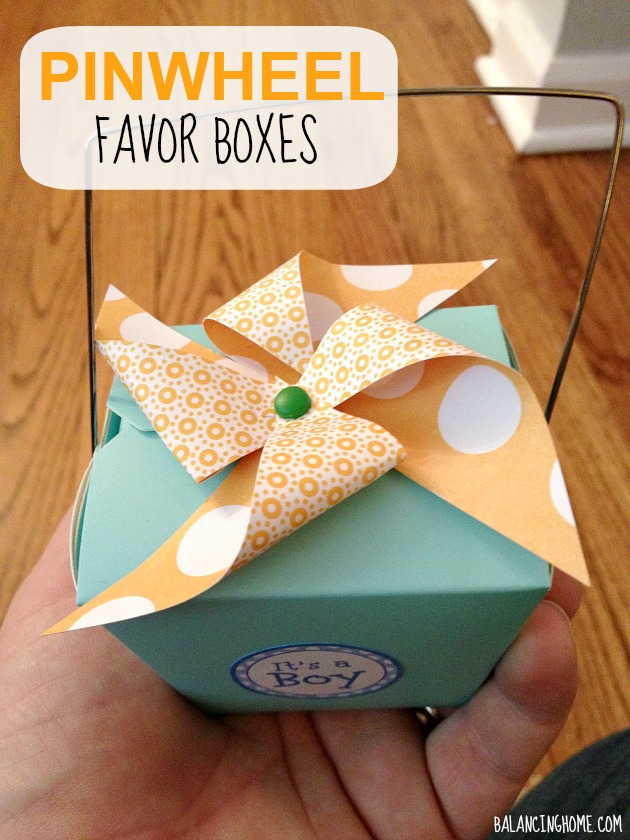
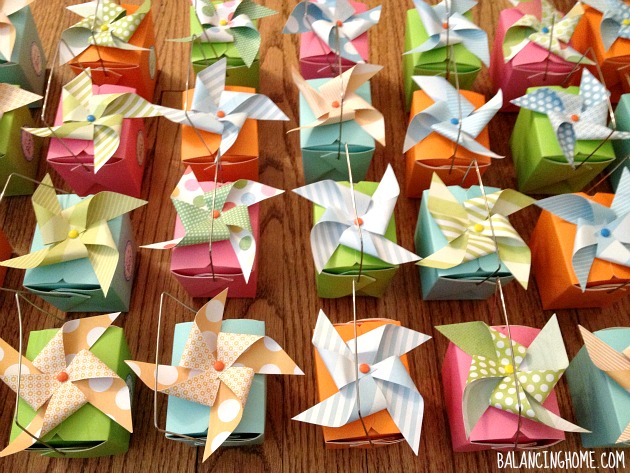
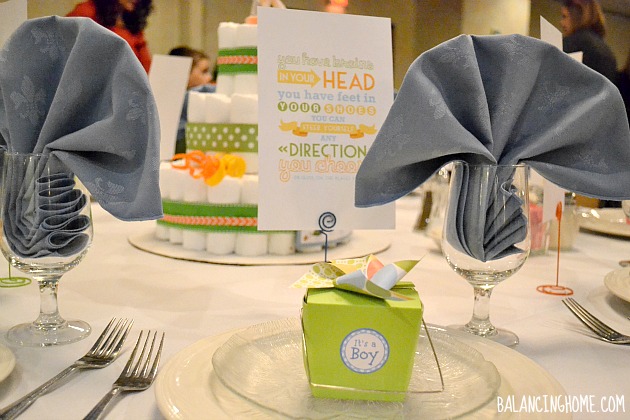
The tables were decorated with centerpiece diaper cakes, which went home with the expectant parents, pinwheel favor boxes and a Dr. Seuss Quote in a wire picture holder.
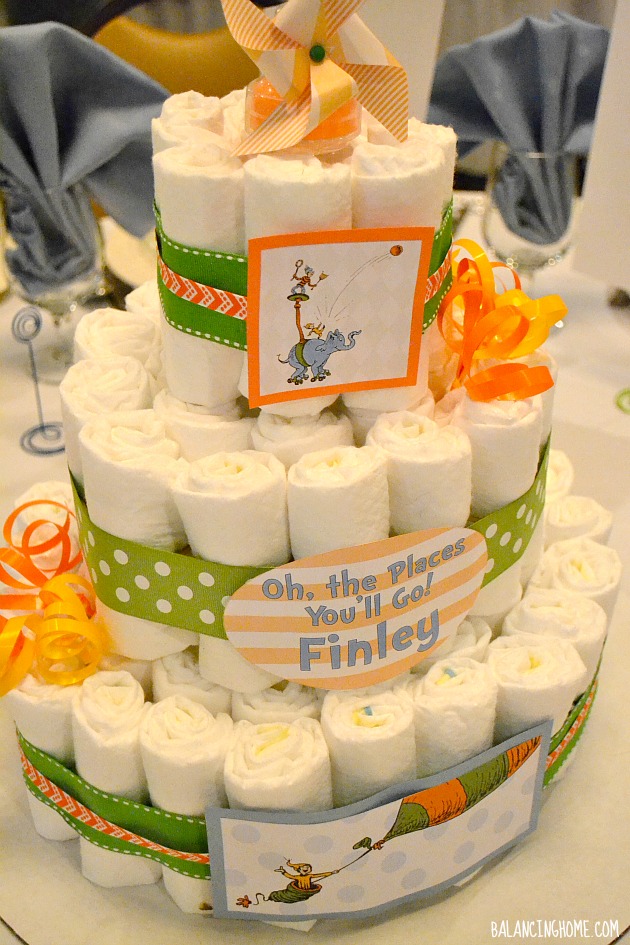
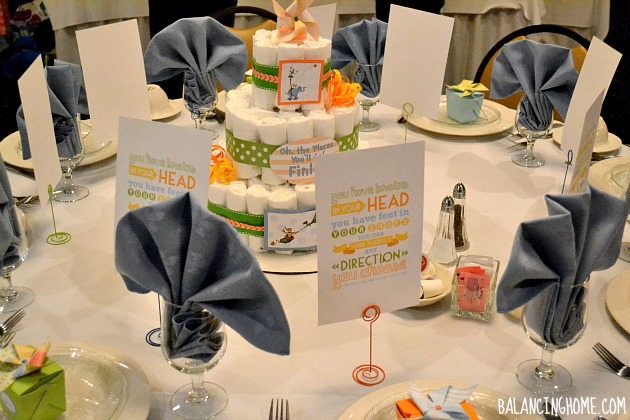
I can totally share the details on the diaper cake later, if people are interested. Today I am sharing the favor boxes.
They were super easy, but a tad time consuming.
You see why? To create these favor boxes I used:
- Pre-made boxes sold in bulk from Hobby Lobby
- It’s a Boy! Stickers from Hobby Lobby (Yours could say Happy Birthday, or It’s a girl, etc.)
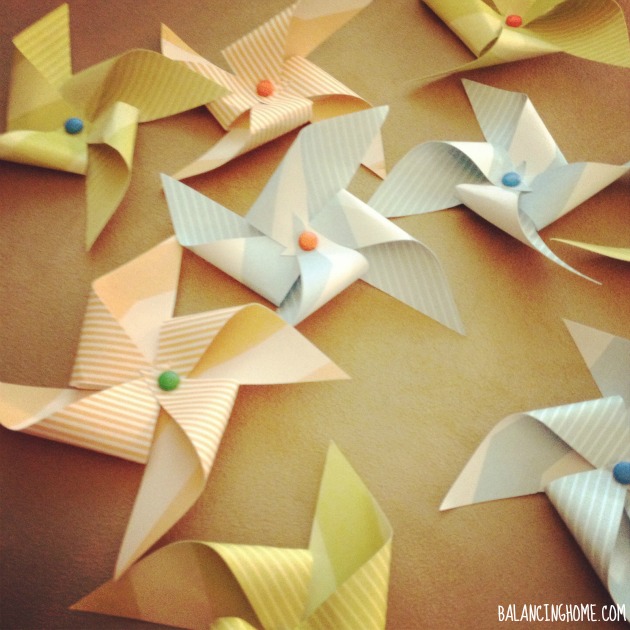
- Two sided paper. By far the hardest thing for us to find, especially in the right colors. It was a small pad we found at Michael’s. Luckily we only needed a 3×3 square.
- Brads. Ours are from Michael’s. There was actually quite the selection.
- Adhesive. I used Zots to stick the pinwheels to the boxes.
Start by cutting your paper into squares. However big your square is, is how big your pinwheel will be. My pinwheels are made from a 3 inch by 3 inch square. I had a paper cutter handy and my belly acts as a pretty good table, so I just lounged on the couch and watched T.V. while assembling pinwheels using my belly as a table, of course. The pinwheels just started piling up next to me on the couch. That is how we roll.
Please allow me to create a photo demonstration of pinwheel making.
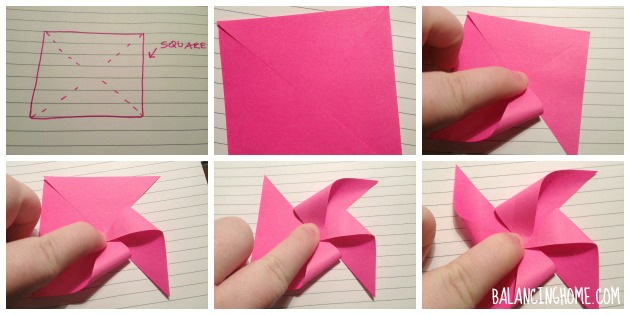
After you cut your paper to the size you would like (in a square, of course), you cut in from each corner to the center (not all the way to the middle, though). I didn’t measure, I just snip, snip, snip, snipped. Then you fold in each corner, always folding the farthest corner towards the center. Because this crafty paper was thick, I used a little tack to poke a hole, before pushing the brad through. Pop a brad in and done-zo!
The favor boxes were filled with chocolates and then I closed them up and plopped an, “It’s a Boy” sticker on it. When all the boxes were ready to go I stuck a Zot on the back for the pinwheel and stuck it on the box. You could easily just bust out some scotch tape and create little tape balls. Whatever works for you. Don’t mind this fuzzy, middle-of-the-night-I-am-tired-of-making-pinwheels-iPhone-photo.
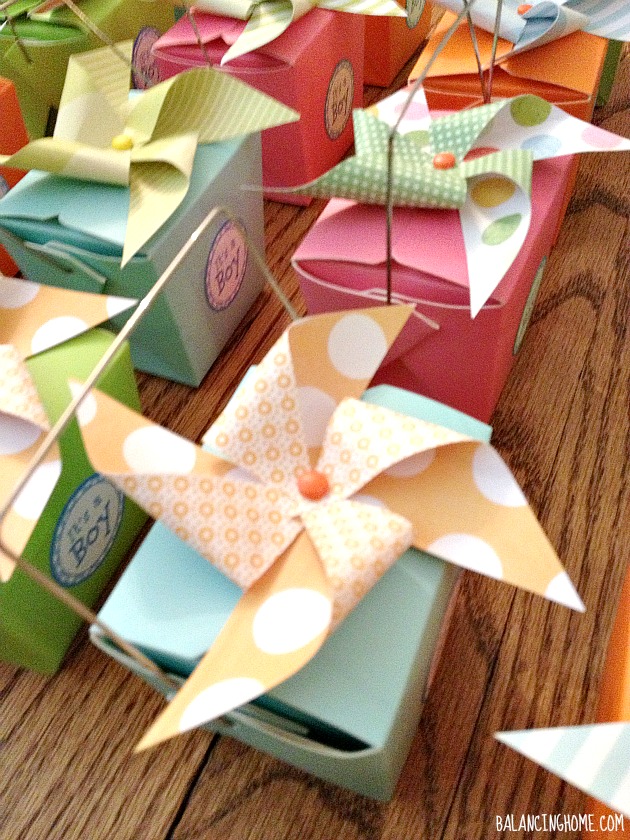
I feel like they added a cute little something whimsical and Seussical to the table.
Thanks for crashing the shower with me. Anyone else celebrating milestones lately? It seems this spring is full of them. Wedding shower, wedding, baby showers, 60th wedding anniversary and soon—New babies!
Sharing this project with: Home Stories A to Z: Tutorials & Tips Link Party, Tatertots & Jello: Weekend Wrap Up Party, Thrifty Decor Chick: Before and After Party
Want FREE printables and more. Join my newsletter!
Subscribe to get our latest content by email.