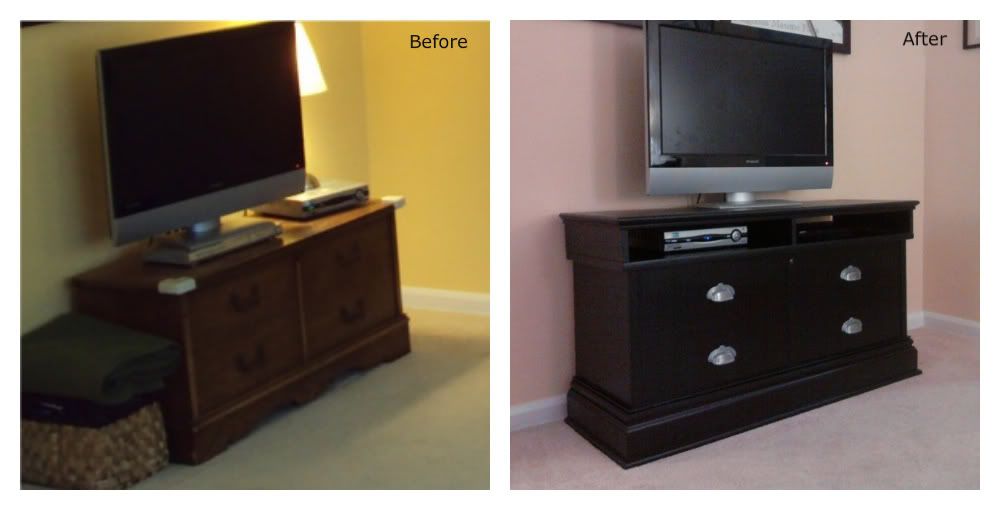
This project took place back when there was no blog, no reason to closely document before and afters. Afters weren’t hard. My husband was so proud of the project he snapped afters and texted them to his parents. Befores were a little harder to come by. I dug through the photos and cropped a few and came up with this:


If you haven’t caught on yet, we are looking at our T.V. stand (I use the term loosely). When we upgraded to a flat screen T.V it no longer fit in our giant (tall and deep, but not wide enough) T.V. cabinet. Now that we weren’t sporting a tube T.V. we didn’t really need a T.V cabinet with doors, etc. This is my mother’s hope chest that she gave to me (perk of being the oldest). It was just the right height and depth for a T.V.. It didn’t match our taste and the T.V. had to rest on the DVD player with the cable box next to it. Not ideal. Then my husband did this:
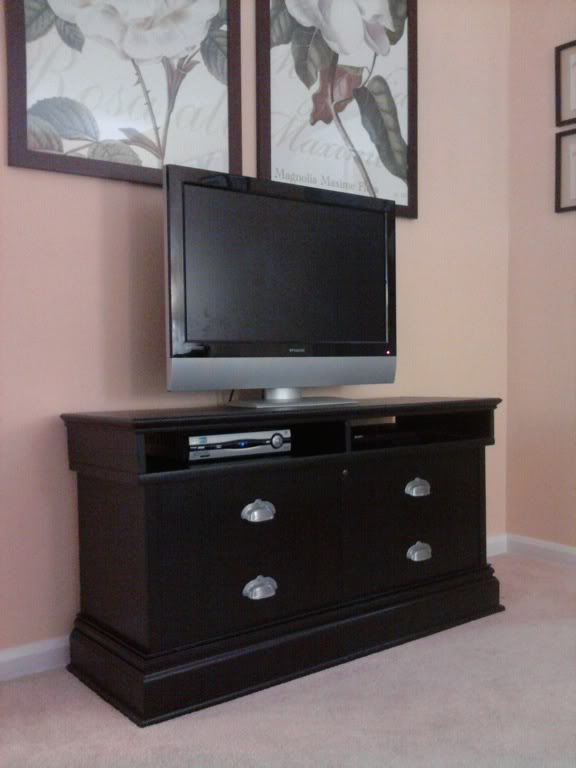

AhhMazing! Right? Sorry ladies, he is mine. Seriously though, that is the same piece of furniture with some minor tweaks. You can seriously turn a bench, dresser, chest into a T.V. stand using some plywood, brackets, paint and trim.
Building the Top
- One piece of plywood cut to size (however big the piece of furniture is).
- We used the left over to create the three vertical pieces. The center piece offers support and makes for a nice little divider. We decided how to tall to make it based on our cable box and DVD player.
- Attach three vertical pieces to the top using L-brackets.
- Dress it up by adding some trim. We used left over trim (free) and attached it using a pin gun.
- (optional) In this case my husband added trim to the bottom of the base with a pin gun to cover up the scroll stuff we weren’t loving.
- Paint the top (you just built) and bottom (the existing piece of furniture) to give it a cohesive look.
Combining the Top (you just built) with the Bottom (your existing piece of furniture)
- Attach the unit you built to your furniture with a brackets on the back side. This will keep the top in place, but allows you to take it off without damaging the furniture. This way if you decide you want the dresser to be a dresser and not a T.V. stand you just unscrew the bracket and voila! You have your dresser back.
- (optional) If your piece has hardware replace it. We changed the handles to update the look.
I don’t know about you guys, but I was shocked at how pricey an entertainment center can be. This means any rummage sale find, craigslist score or stored away piece of furniture can have a new life, a second chance.
✕
Want FREE printables and more. Join my newsletter!
Subscribe to get our latest content by email.