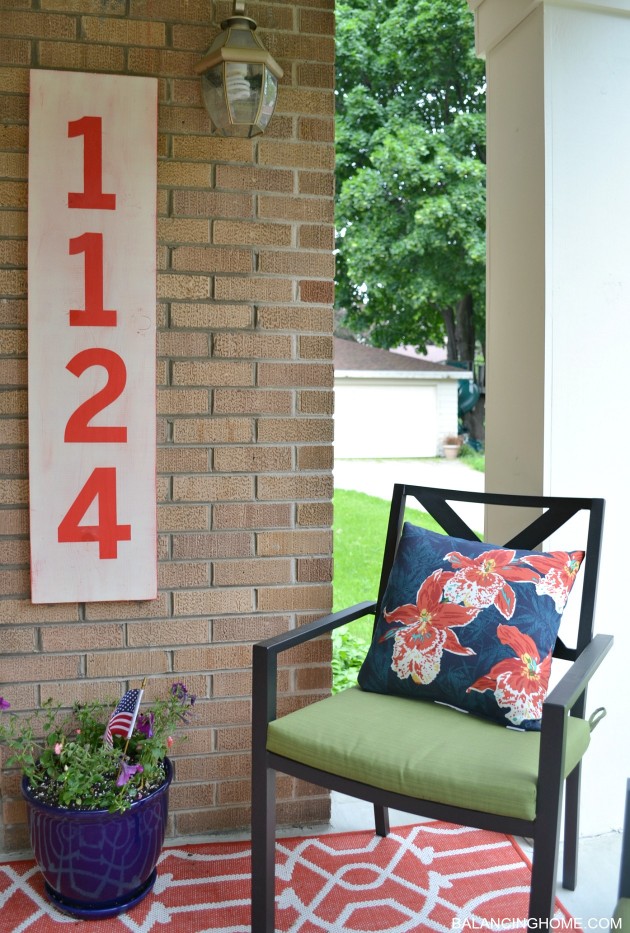
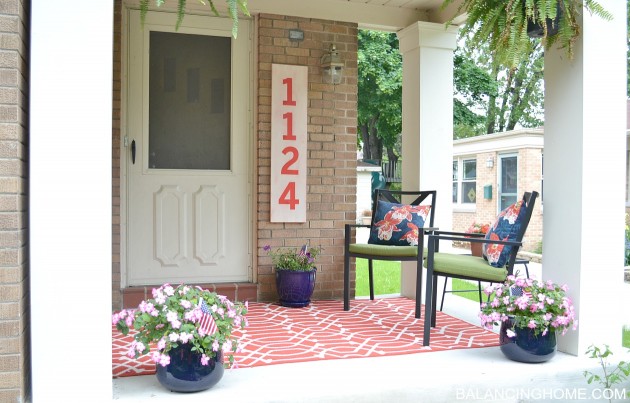
Yesterday I shared how we made and hung our very cool number sign as part of our porch makeover. Today, I want to share the details of this project.
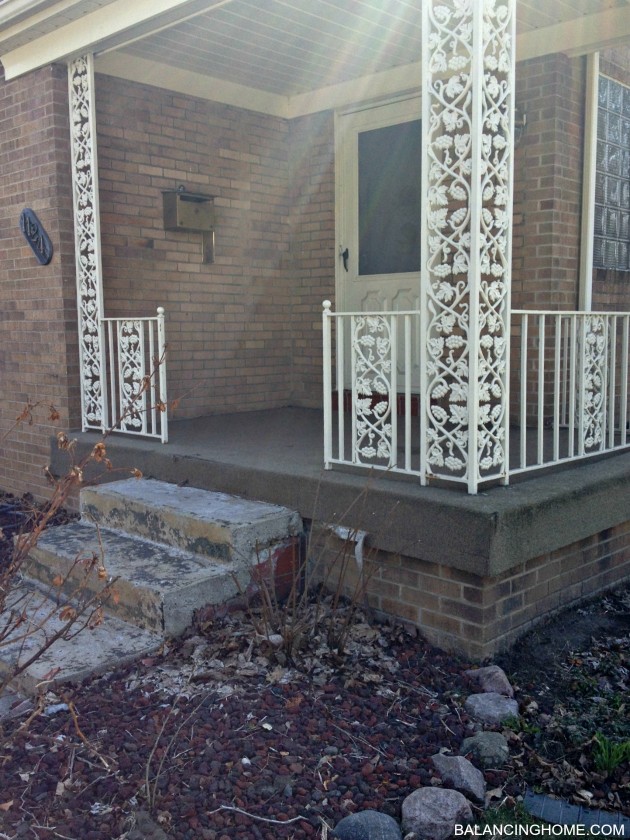
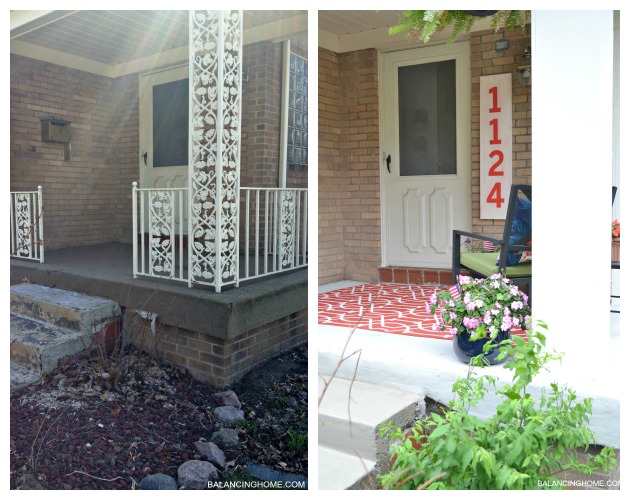
When we first looked at our house 7 years ago all I saw was wrought iron vines and grapes. I almost didn’t even set foot inside because I couldn’t get past this. It made the house feel dated and like something meant for a grandma.
Ironically, the entire house was dated, but I loved the neighborhood and immediately had a vision. Over the course of 7 years we have taken down walls, gutted the kitchen and bathroom, tore up carpet, refinished floors, tiled, painted, decorated, cut down trees, put up a fence, and countless other projects (Check out our house tour).
Despite my claim that the front porch would be the first to go, it took us 7 years. Part of the reason it took so long was the job felt overwhelming to us. That, along with time and money, meant it just kept being ignored. And wouldn’t you know–it was a couple hundred bucks and a weekend and one evening. We currently have our home listed for sale by owner, and this was the kick in the butt we needed to up our game and improve our curb appeal.
There is actually very little information about updating a porch. Eventually you get to a point where you just jump in. This face lift is completely cosmetic. We did nothing to the structural integrity of the porch. We did not feel comfortable removing the rod iron, seeing as though it is a covered porch and the wrought iron columns support the roof.
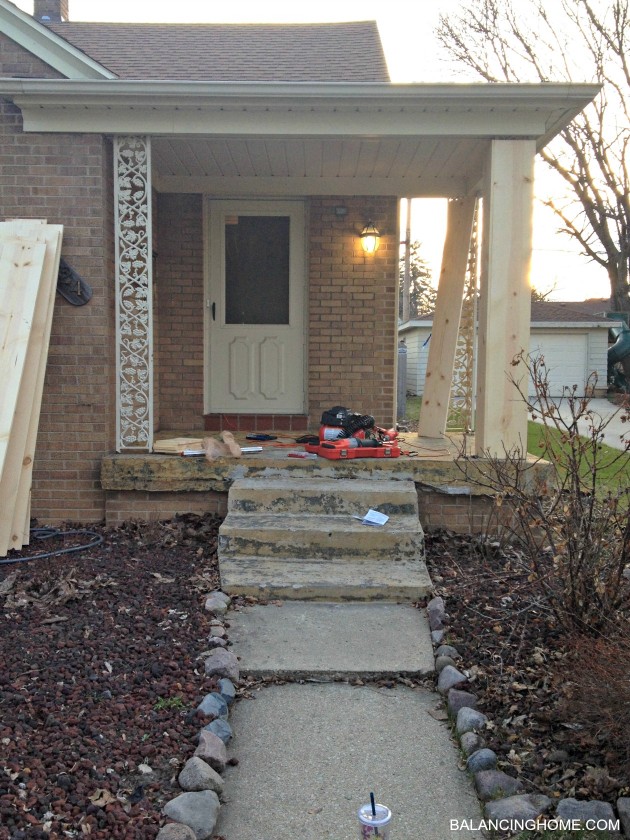
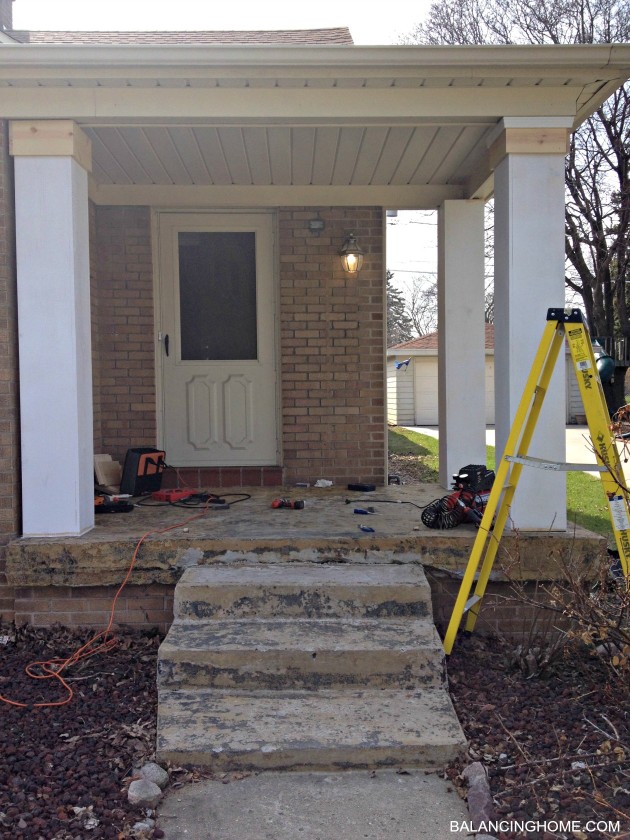
Our porch was actually carpeted. This carpeting was ripped, ratty and falling off in spaces. Under the carpeting were glue stains and debris. When we removed the carpeting we were left with less-then-pretty concrete. We considered carpeting right over it, but at the end of the day we really didn’t want a carpeted porch. While we debated what to do with the porch, we worked on the columns.
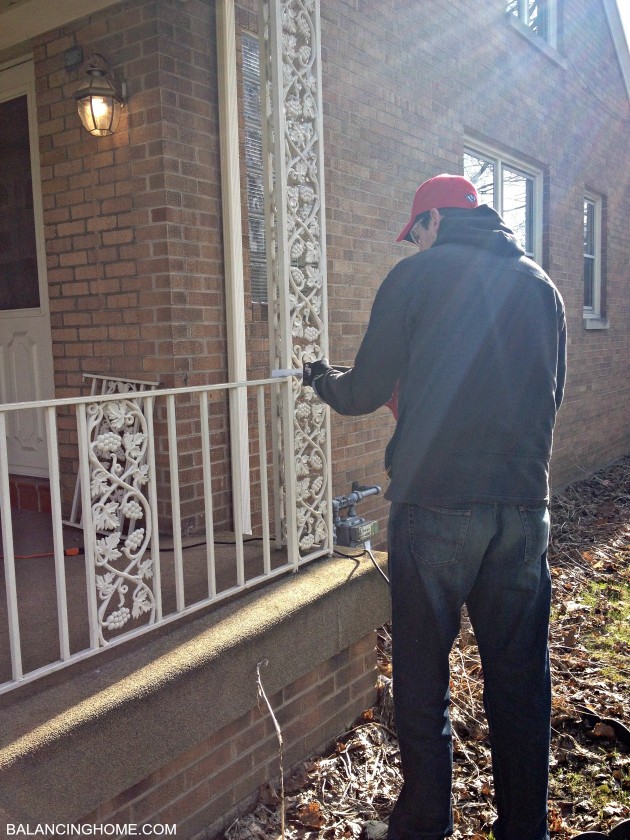
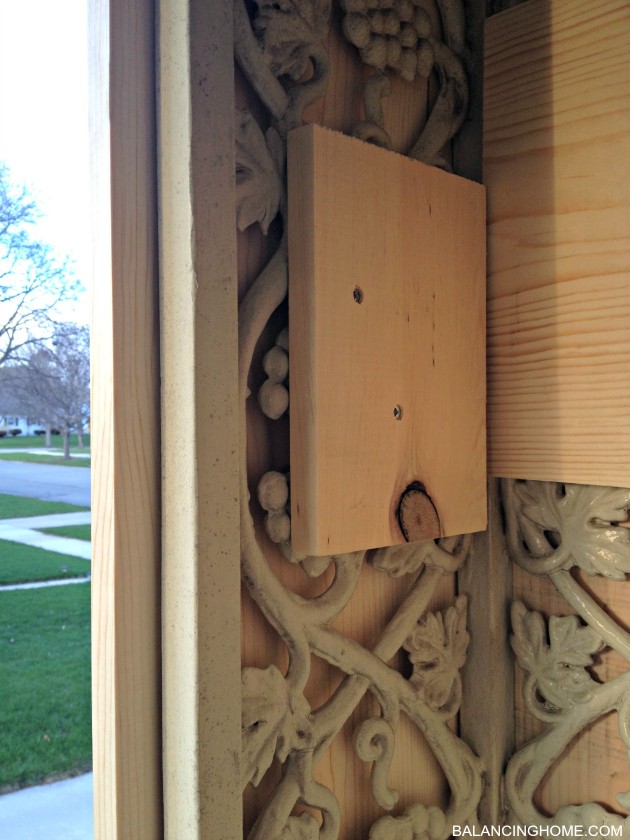
The first thing that had to go were the railings. We cut those using a Sawzall and a grinder. We cut them as flush as possible at the columns and at the floor where they attached.
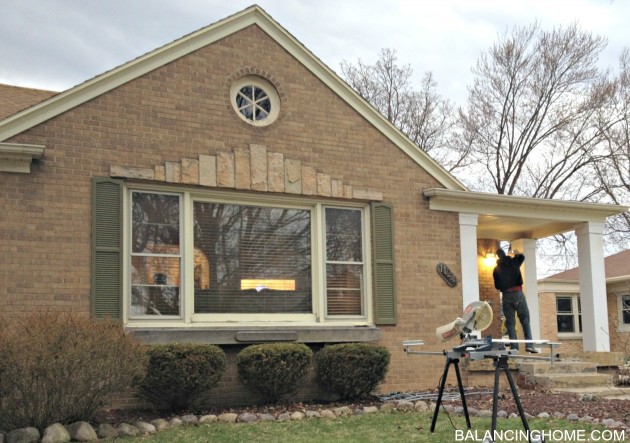
We used 1x12x8 common board to wrap the columns. We started by securing the first board by drilling into an anchor board on the other side. We did this on top and bottom and anywhere anchoring was allowed. We then attached each board by drilling into the neighboring board. Once the columns were wrapped we added trim. We actually still need to add the trim on the bottom. We caulked and painted and then stood back and admired our work.
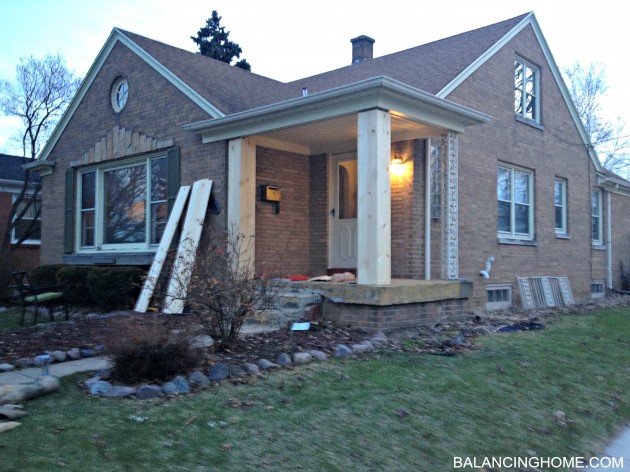

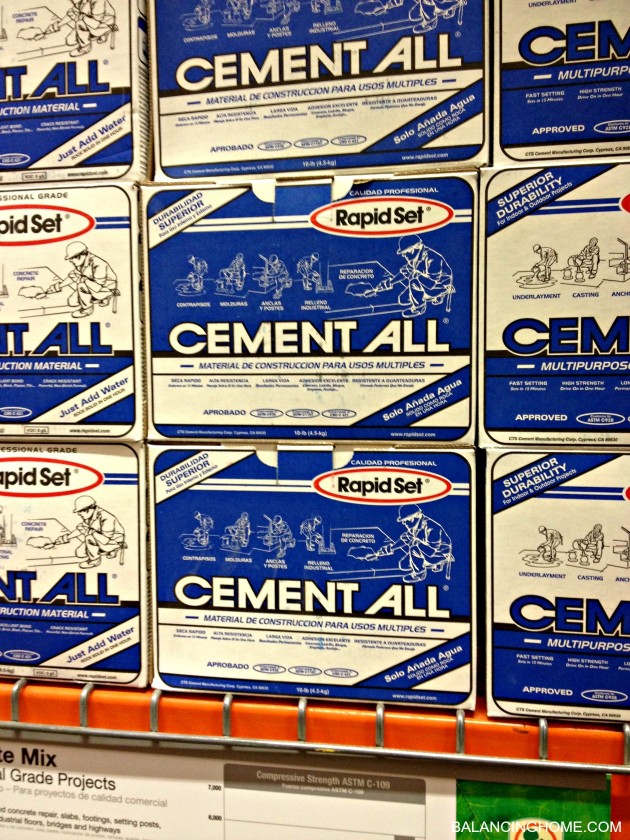
Then someone scheduled a showing so we left the kids with grandma and grandpa for the evening and we resurfaced the concrete. Our friends at Home Depot recommended this product to resurface the porch. We completely finished this job in an evening and Ross walked out the front door the next morning. My one tip is to not be afraid of the sponge. You can go over the surface almost immediately with the sponge to shape, smooth and texture your work.
I don’t really have pics of the process because my hands were dirty, it was dark and we were working on a tight timeline.
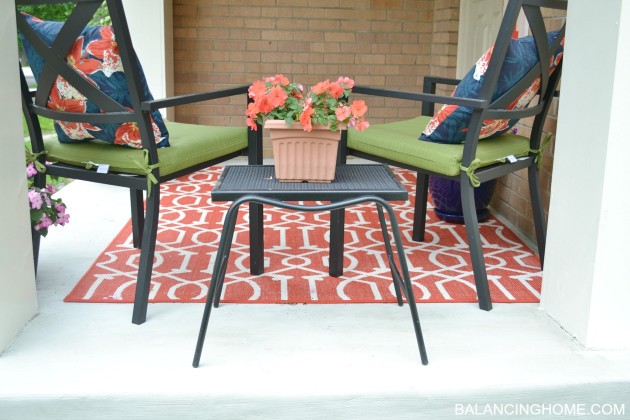
We originally planned to add railings back, but upon review or our city building codes our porch doesn’t require railings (it is less then 2 feet high). We decided to forgo them and really love how open it makes the space feel.
Our house finally looks like us! Now, what you see when you walk through the door is what you would expect to see. I cannot believe it took us so long!

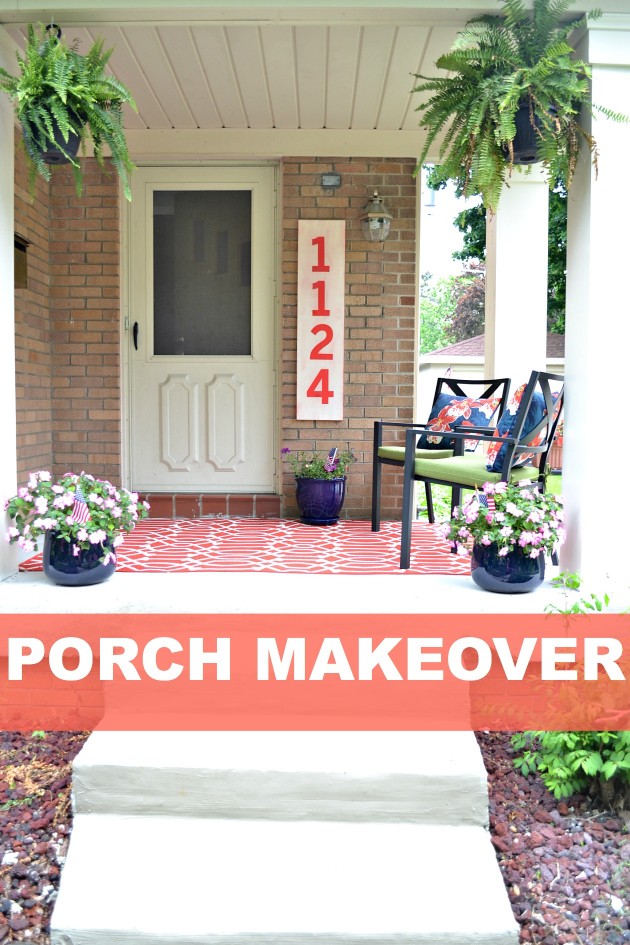
The patio furniture, cushions, pillows and rug are Target. The flower pots are ShopKo. The building materials and hanging ferns are Home Depot and the details on the street numbers can be found here.

I hope that answers any questions about the makeover. Hopefully if you are on the fence about taking on a project, I just gave you the courage to go for it!
Want FREE printables and more. Join my newsletter!
Subscribe to get our latest content by email.